Introduction to Elephant Drawing
Drawing elephants is an exciting yet challenging subject for artists of all levels. Their massive bodies, intricate skin textures, and expressive features make them an iconic animal to depict on paper. Whether you’re a beginner or an advanced artist, mastering the art of drawing elephants can bring your skills to a whole new level. In this guide, we’ll explore everything from understanding elephant anatomy to perfecting the smallest details. Learning to draw these magnificent creatures accurately starts with a strong foundation. So, let’s dive into how to capture the essence of an elephant on your canvas.
Understanding Elephant Anatomy
Before you begin drawing an elephant, it’s important to understand its unique anatomy. Elephants are known for their robust forms, massive heads, and long trunks. These features make them one of the most distinguishable creatures, but also tricky to capture without a solid understanding of their body structure.
Elephants have broad, round bodies supported by sturdy legs. Their trunk, the most defining feature, is highly flexible and can be positioned in various ways in your drawings. Don’t forget their large, fan-shaped ears, especially prominent in African elephants. These details are crucial when attempting to bring realism to your art. Focusing on these anatomical characteristics will help you portray elephants in a way that reflects their natural form and movement.
Materials and Tools for Drawing Elephants
Choosing the right materials is another important step in drawing:k4ihdmzbtqg= elephant artwork. While you can use any drawing tools you are comfortable with, there are some that work particularly well for depicting the texture and bulk of an elephant.
For beginners, graphite pencils offer great control and versatility. You can use softer pencils to create rich, dark lines and shading for an elephant’s thick skin. Charcoal is another fantastic medium if you want to achieve more dramatic contrasts and textures. For artists seeking even finer details, mechanical pencils or fine-tipped pens can be used to capture the small wrinkles and intricate patterns of an elephant’s skin.
Additionally, blending stumps or tissues can be used to soften shadows and create the impression of rough texture, while erasers help lift off graphite for highlights, like those seen in the elephant’s eyes or tusks.
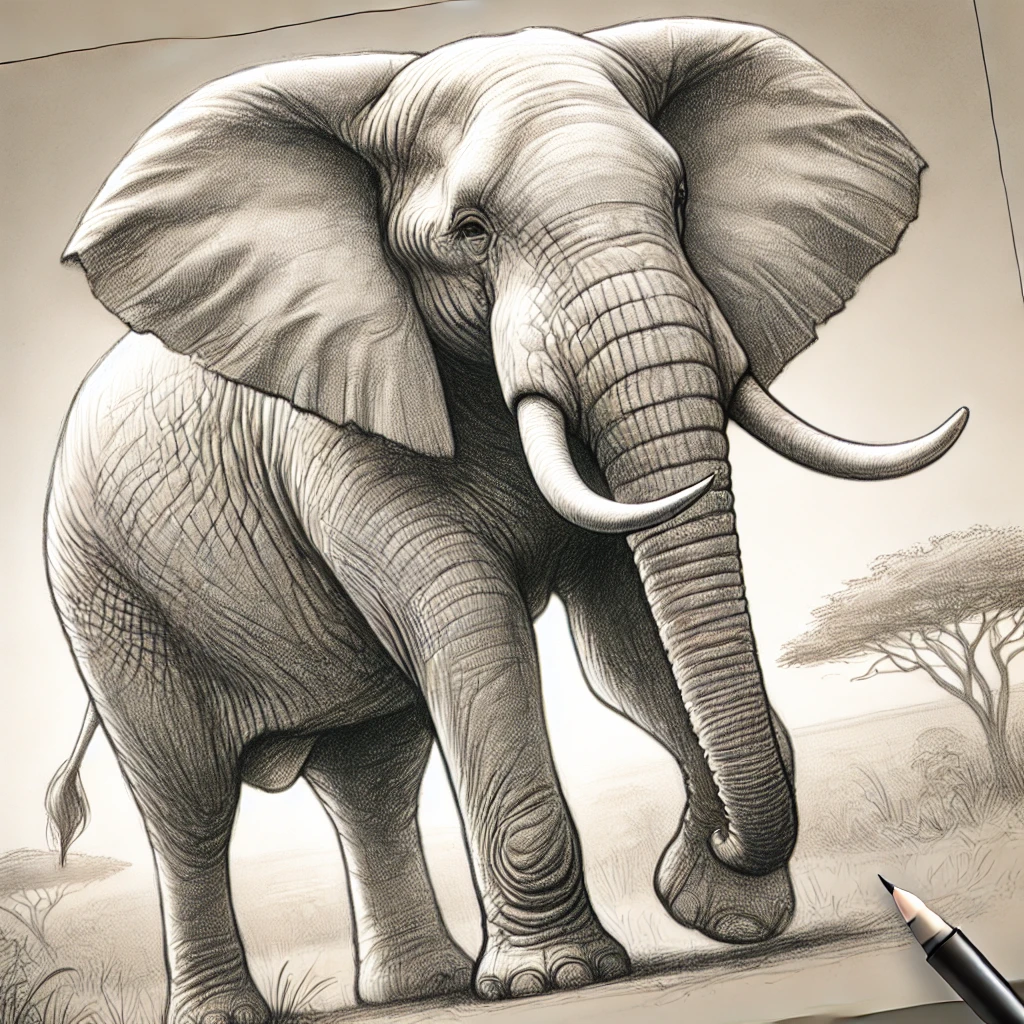
Step-by-Step Guide to Drawing an Elephant
Now that we have the right tools and an understanding of elephant anatomy, let’s break down how to draw an elephant step by step:
- Sketch Basic Shapes: Start by lightly sketching the basic shapes. Draw a large oval for the body and a circle for the head. Use long, curved lines for the trunk and legs.
- Outline the Body Structure: Next, refine these shapes by outlining the main parts of the elephant’s body, including the trunk, ears, and legs. Focus on capturing the elephant’s large, round belly and thick legs.
- Add Detail to the Face: Draw the elephant’s eyes, placing them close to the center of the head, and outline the large ears, making sure they fan out prominently.
- Refine the Trunk and Tusks: Now, give more attention to the trunk and tusks. The trunk should be flexible, and the tusks should be curved and smooth.
- Add Skin Texture and Wrinkles: Elephants have rough, textured skin. Use cross-hatching or fine lines to create the impression of wrinkles and folds in their skin.
- Shading: Finally, use shading techniques to add depth and contrast. Shadows can be added under the legs, on the belly, and around the ears. The skin’s rough texture can be emphasized through varied shading.
By breaking down the process step by step, even a complex subject like drawing:k4ihdmzbtqg= elephant becomes more manageable.
Techniques for Capturing Movement
Elephants, despite their size, move with an elegant, almost slow grace. Capturing this in your drawings requires observation and an understanding of how they walk and interact with their environment. Gesture drawing is a great technique to capture the fluidity of their movements quickly. Focus on the flow of their trunk and the subtle sway of their body as they walk.
When drawing an elephant in motion, start by capturing the overall posture and movement before focusing on details. Keep the lines loose at first to suggest movement, then gradually refine them to define muscles, wrinkles, and shading. The trunk, especially, plays a key role in showing action, whether it’s curved upward or swinging naturally as the elephant walks.
Tips for Adding Detail and Texture
Detailing is what truly brings an elephant drawing to life. Their skin is known for its rough, cracked texture, which can be intimidating to draw. However, with patience and technique, it’s possible to capture this effectively. Here are some tips:
- Focus on Wrinkles and Folds: Elephants have distinct patterns of wrinkles, especially on their trunk, legs, and around their eyes. Use fine lines to outline these areas and darken them slightly for added depth.
- Use Cross-Hatching for Depth: Cross-hatching can help give the impression of rough skin. Light hatching can be used for areas in the light, while darker, more detailed hatching works for shadows.
- Highlight the Tusks and Eyes: Elephants’ tusks and eyes can serve as focal points. Use your eraser to create highlights, making the tusks gleam and the eyes appear alive and reflective.
Observing real elephants, either in photos or in person, will greatly aid in adding the tiny details that make your drawing:k4ihdmzbtqg= elephant more realistic.
Common Mistakes in Drawing Elephants and How to Avoid Them
Even experienced artists can struggle with some common mistakes when drawing elephants. Here’s how to avoid them:
- Incorrect Proportions: Elephants have very specific body proportions, especially their large head, long trunk, and thick legs. Make sure to carefully observe their body ratios before starting your drawing.
- Over-Detailing Too Soon: It’s tempting to start adding wrinkles and textures right away, but focusing on the overall form and anatomy first is crucial. Get the proportions and posture correct before diving into details.
- Flat Shading: Elephants are large, three-dimensional creatures, so be mindful of light and shadow. Shading helps to create depth and should not be overlooked.
By being aware of these common pitfalls, you can avoid frustration and achieve a more lifelike elephant drawing.
Advanced Techniques for Elephant Drawing
Once you’ve mastered the basics, you can explore advanced techniques to make your elephant drawings even more impressive. These include using mixed media, such as combining charcoal and graphite, or experimenting with digital art tools. You might also try drawing elephants from different perspectives—above, below, or at an angle—to challenge yourself and improve your skills.
Additionally, try creating more dynamic compositions by placing your elephant in different environments, like a savannah or near a waterhole. This adds context to your drawing and helps tell a story through your artwork.
Conclusion
Drawing an elephant is a rewarding challenge for any artist. By understanding elephant anatomy, using the right tools, and practicing both basic and advanced techniques, you can create beautiful and realistic elephant art. From their majestic movements to the intricate details of their skin, every part of the drawing:k4ihdmzbtqg= elephant process adds to the final piece’s impact.
With the tips and techniques outlined here, you’re now ready to start drawing your own elephants and improve your skills. Remember, practice and patience are key in mastering this art form.